


How to Tune SRAM Force?
If you’ve spent a while using Shimano or Campagnolo, changing to SRAM can be interesting. Not just for getting used to SRAM’s Double Tap system, but also on how you set SRAM up. We felt it would be a good time to explain to you how to set up SRAM Force and go through the ideas that might seem a little unorthodox if you’re used to the other two big groupset manufacturers.
SRAM Force Front Derailleur
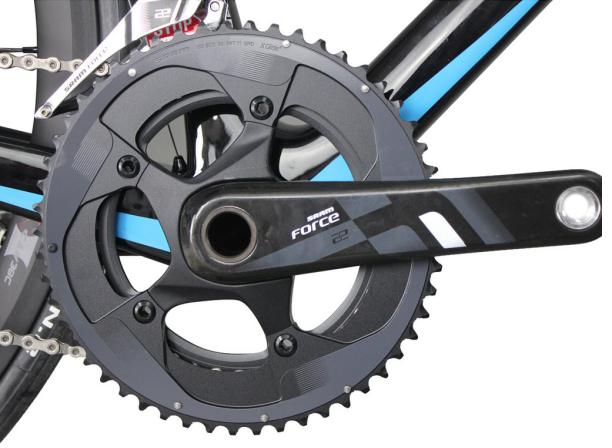
Yeah, most people who are going down the SRAM road are thinking about ditching front derailleurs, but if you want to set up a YAW front derailleur, it can be a little more finicky than a front derailleur from Shimano or Campag.
To set up an SRAM front derailleur, you’ll need 4mm and 2.5mm hex keys. What you need to know when we start is that the front of the mech cage moves more than the back of the cage. The reason for this is that it then means we don’t have to trim the front mech when we ride, as you should not get any chain rub.
Because of this cage design, the position of your front derailleur is even more important than on other front derailleurs. The easiest way to set the position correctly is to take your 4mm hex key and loosen the cable anchor bolt and then take the cable out. You can now use the 4mm to loosen the front derailleur itself.
When your chain is on the lower ring, you want the cage on the front derailleur to be about 1-2mm above the teeth on the outer ring.
Alignment
Now you have positioned the front derailleur; you’ll need to align it. You’ll now need your 2.5mm hex key. If you remember above we have the chain on our inner ring, but now we need it on the big ring, and we’ve disconnected the shifter cable.
That is okay, take your 2.5mm hex key and start to turn it clockwise, while turning the pedals slowly. Your mech should now move up and take the chain onto the outer ring. Now you need to see if the white lines on the cage line up with the teeth on the chainring. If you need to change the position, use your inner limit screw.
Once it is in place, tighten your outer limit screw till it bottoms out, and then take it back a ¼ of a turn. You should now have a bike that doesn’t have a chain that overshoots. To double check, have your chain on the smallest cog on the back, and slowly turn the pedals, there should be no rubbing.
Cable time
Now reconnect your cable, it doesn’t need to be tight just taught. Use your shifter and shift down to the inner ring. Nothing will happen as you still have the inner limit screw adjusted to the outer ring. Slowly turn the pedals while you loosen the inner limit screw. The chain will drop down, as that happens, stop adjusting the inner limit screw.
Now shift your chain into the biggest rear cog. Start to turn the pedals slowly and back off the limit screw until the chain stops rubbing on the inner plate of your front mech. If you need a little more cable tension to finish this, use your barrel adjusters and fine tune the tension.
SRAM Force rear derailleur
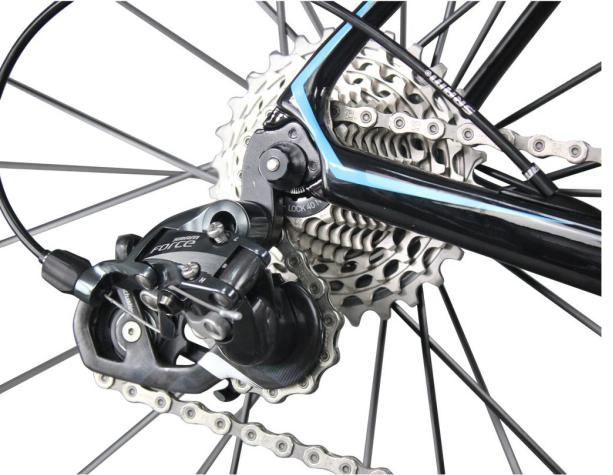
As you can already see, setting up your front derailleur was not too difficult, and if you take your time and don’t rush anything, the same can be said about setting up your rear derailleur.
You’ll need a set of needle nose pliers, 5mm hex key, and a Phillips #2 screwdriver.
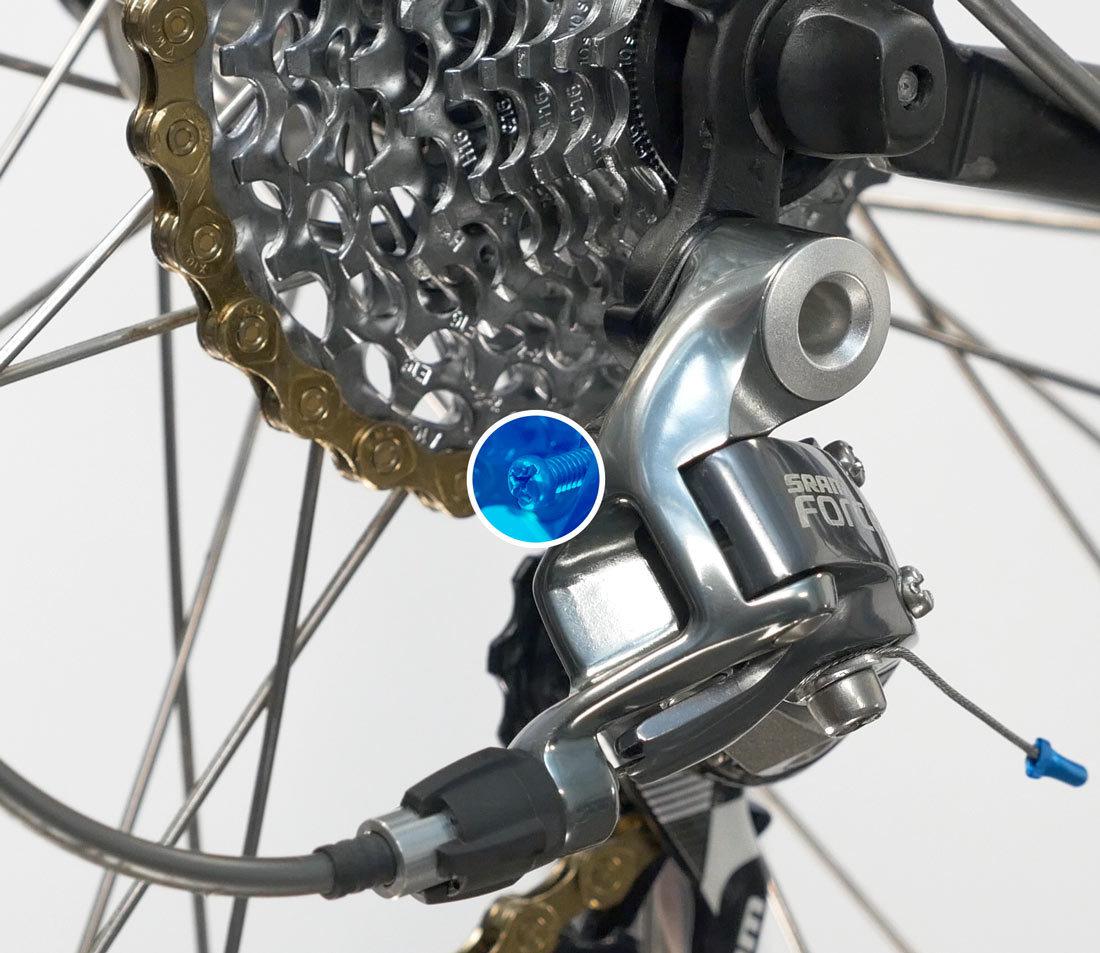
The first part of setting is the H screw; if you don’t know which one it is, it should be the one below the e of Force on the rear derailleur. Firstly you’ll want to tighten the H screw to its tightest point, don’t overtighten or force it.
Now back off the limit screw until the derailleur cog sits directly below your smallest cog on the cassette. When your cog is here, turn the limit screw a ½ turn. Now slowly pedal the bike and listen for any excessive noise coming from the chain. If there is no noise or very little noise, tighten the screw until it hits the second cog, this will create a rubbing sound. Back off the limit screw by a ¼ turn until the noise disappears. Congratualtulations the H screw is now set.
Before we jump onto the next step, give your barrel adjuster a couple of counter-clockwise turns.
Getting indexed
Indexing is the part that strikes fear in the heart of people who are setting up their gears for the first time, but there is nothing to fear. The idea behind indexing your gears is to have the guide pully line up under each of the cogs. Doing so means that for each shift your rear derailleur will be in exactly the right place to bring you the best performance. It is worth knowing that there will be more than one correct barrel position for this job.
You want your chain to be on the outer front ring while we go through this process.
You should still have your chain on the smallest rear cog, shift into the second cog. If when you press the shifter, the chain doesn’t make the jump. Click back down. Then turn the barrel adjuster one full turn counter-clockwise.
Try and change again; you repeat this process until the chain makes the jump smoothly. If to do this you have unwound a lot of the barrel adjuster, shift down to the small cog. Then tighten the barrel adjuster back in, loosen the cable anchor bolt and use the needle nose pliers to pull some more of the cable through, retighten the bolt. All you’re doing is removing the slack, don’t go crazy pulling the cable.
Now try and shift once more, if you jump 2 cogs, shift back down and turn the barrel adjuster 1 full turn counter-clockwise again. Shift up 1 gear, and you should be on the second cog, now we can start to dial in your gears.
Turn your barrel adjuster out until the chain starts to rub on the next cog. Keep pedaling the bike, and slowly turn the barrel adjuster clockwise until the noise disappears. You’ll need to repeat this process for every cog on the cassette, this can be time-consuming but don’t rush it. Every time you get excessive noise turn the barrel adjuster a ¼ turn clockwise.
You may have to repeatedly work up and down the cassette to get this to work. You’ll also want to not do this on the largest cog. Once this is set, it is time to set the L screw.
The L screw
Again, you’ll want to tighten the L screw to its tightest point. Doing so will stop the chain from falling off the largest cog into the wheel. Shift onto the inner front ring and the second largest rear cog. Try and shift onto the largest rear cog. The chances are that this will not happen as the L screw will be too tight.
The other things that can happen are that the chain might go up slowly, or will make excessive noise when on the cog. These also mean the L screw is too tight. If it changes with no issues, then the L screw isn’t too tight. If you get an easy change, drop the chain down a cog, and then tighten the L screw a little more.
Once you have a tight L screw, then we can set it. You’ll want to loosen the screw by a ¼ of a turn until you can easily make the shift up to the largest cog. There should be no excessive noise, and the shift should be crisp, at this point, the L screw is set.
The B screw
Now you only have to set the B screw. The B screw is the Body Angle screw, and this sets the spacing between the guide pully and the cassette cogs.
To set this screw, you need to be on your inner front ring and the largest rear cog. The ideal gap will be around 5-6mm, but you don’t need to break out special measuring tools, using your eyes should be good enough.
If when you’re pedaling through the gears and the changes are all smooth and crisp, you more than likely already have the correct gap. If you need to bring the guide pully in, tighten the B screw. If you need to increase the gap, loosen the B screw. If it looks like you need to make major changes with your B screw, then you’ve made a mistake setting up your gears, and you’ll be better served starting over.
Once the gap looks okay, then you’ve successfully tuned your SRAM Force setup, and you can go and hit the roads.
