


Get Your Mountain Bike Ready to Blast the Trails This Summer
When the sun starts shining, and the trails start to head towards their prime conditions, it can be tempting to just grab your good bike out of storage and just get out and shred. Your enthusiasm is understandable, but you probably want to take a minute and give your bike a good check over before you go out and get yourself unstuck with a completely preventable problem.
When you check your bike over the best system to use is an M-check.
Once you get into the habit of performing an M-check, it will give you an ability to quickly and easily check your bike.
What should I be looking at, though?
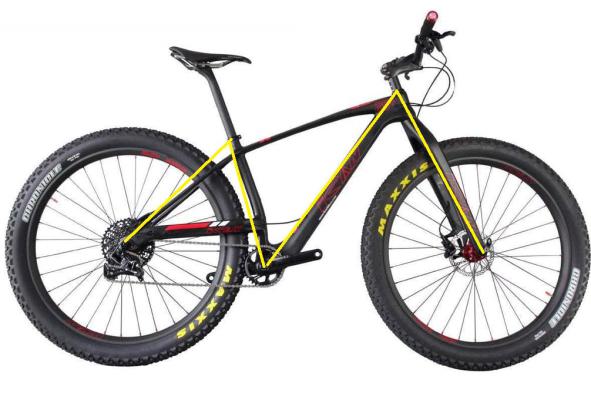
Tires
You want to make sure your tires have life left. If they are cracked or have knobs hanging off, it is probably time to think about a new set of tires. If they are worn down, to where the tread looks like that of a city bike, you’ll also want to be thinking about buying some new rubber.
You’ll also want to look for any bald patches or debris stuck in the tire. If you’re running tubeless before you pull the debris out, it could be a good idea to top up your tubeless sealant. Now set your tires to the pressure of your choice.
Wheels
Spin your wheels, are they still definitely true. There should be no sideways movement or a hop up or down. There is no rough feeling coming from the hub or freehub when you spin the wheels, and also no side to side play in the hub. You’ll also want to make sure you have the correct number of spokes. Then you’ll want to make sure none of them is coming loose, so squeeze them, and you’ll be able to get a rough idea. It would be better to use a spoke tension meter, but most of us don’t keep them in our tool kit.
You’ll also want to check your rim. You’ll be looking for any small cracks, or larger ones as well. You’ll tend to find that these are most likely to be located where the spoke nipples enter the rim. Check your cassette and make sure none of your cogs looks worn down excessively. You’ll also want to try a chain checker on your chain, and make sure you don’t need to replace your chain. Does your chain also need to be lubed?
Brakes
When you gave the wheel a spin just above, did you notice if the brake was rubbing? Now, we could have put to check for that above, but it is better to build a routine, and checking your brakes separately from your wheels, is a good part of that routine.
Any scuff could mean that your brake calliper needs to be realigned, or that your rotor needs straightened. Have a look for any side to side movement in your rotor. It's also easier to straighten a rotor than you might think.
Seat post
Give your saddle a waggle, is it tight on the seat post, or does it need to be tightened. Then double check that your seat clamp is securely holding your seat post, it is also highly worth taking your post out and regreasing it. If you have a dropper post, can it go up and down easily? Check as well for play in your dropper post as well.
Rear shock
If you have a rear shock, give it and its mountings a check over. Can the shock move through its travel easily? Make sure there is no damage to the shock. The make sure it is set to your correct PSI setting, you did write that down when you set the bike up originally? Is there any side to side play in the bushings or bearings that mount it to the frame. Then make sure that none of your linkages is cracked or bent.
Cranks and bottom bracket
When you come down to the cranks, you want to start by making sure all the bolts are nice and tight that hold your cranks on. I also like to take my pedals off and regrease the threads, preferably with anti-seize than grease, and tighten them back up. Seized pedals are never fun.
Once all the bolts are snug, try and see if you can get side to side movement when holding the crank arm. If you can, then you may be looking at a new bottom bracket. Then give everything a look over to make sure there are no cracks or damage you missed while checking the bolts.
Have a look at your chainring(s) and see how worn down the teeth look if they look like shark’s teeth, then it is time for a new one. You’ll also want to make sure it fits tight to your crank arm and that there are no cracks or damage on it. Give it spin and make sure that it is not bent.
Headset/front end
Make sure that your stem and bars are all at the correct torque settings and that everything is nice and straight. Are your controls where you like them? Give them all a run through to make sure that they are working just as you would expect. Are your grips looking a little worse for wear? A new set of grips can feel great when you put them on, and for the cost of a set of grips, they might just be worth changing.
Hold your front wheel and try and rock your headset. There should be no front to back movement. Then allow your bars to swing freely, there should be no binding or tight spots. Now check around the front of your bike for cracks or damage, that you may have missed when checking your parts.
Front fork
Similar to a rear shock, you’ll want to make sure that your fork can easily move through its travel. Press down on the front end and check the rebound. Is there any oil or dirt coming out of the seals? Make sure your seals aren’t perished.
Make sure there is no damage to the stanchions, we don’t want any scratches or dents on them. Double check that all the settings on the fork are set where you want them. Make sure the front wheel is secured in the fork. Check the front wheel following the advice above. Then get on your bike and give it a short test ride, making sure to cycle through your suspension a few times.